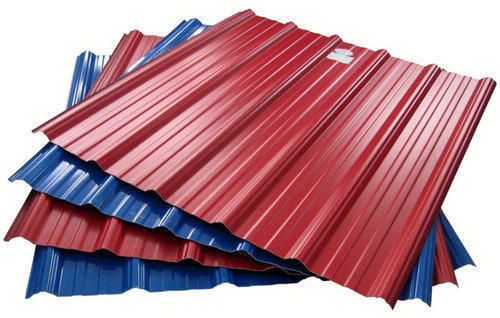
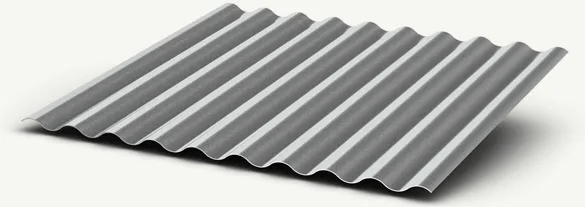
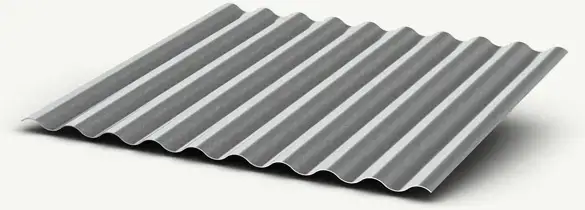
This is especially true since the dips and swells of the corrugated metal come in different widths and shapes. In most cases, the corrugated metal roofing will create a rustic design that is perfect for a garden or patio area.
TOOLS REQUIRED FOR INSTALLING CORRUGATED METAL ROOFING
The following items will be needed as part of this DIY project:
- gloves and safety googles
- hammer
- Measuring tape
- Metal panels (either tin or galvanized steel)
- Paint and paintbrush (optional)
- Polyurethane sealant
- Ridge peak
- roofing cement
- Roofing felt
- Roofing nails
- roofing staples
- Screwdriver
- Staple gun
- utility knife
- Washers and screws
CORRUGATED METAL ROOF INSTALLATION INSTRUCTIONS
By following the 10 simple instructions below, you will be able to install a corrugated metal roof on your garage or shed.
STEP 1: MEASURE YOUR ROOF
Without getting up on the roof itself, you can get the measurements simply by measuring the length and width of the roof and then multiply these together. If the roof has a peak, then you will need to get the measurements of both sides of the roof.
Also remember
You will need slightly more than the measured amount of material due to the need for overlap on the roof. The suggested overlap for a roof is 4 inches.

STEP 2: BUY THE METAL PANELS
Depending on the area of the roof, you can use different sized panels. You can either buy large metal panels of up to 32 feet in length and then cut them to the right size, or you can purchase pre-cut metal panels at a home improvement store that may be only 10 or 12 feet in length.
If you need to cut the sheets, you can use an angle grinder, a saw or tin snips.

STEP 3: LAY THE ROOFING FELT
The purpose of the roofing felt is to create a layer of insulation. If you are installing a metal roof on a structure like a patio cover, you may not need this insulation layer. (Instead, you can just secure the metal roof directly to the wooden beams.) Cut the roofing felt to fit with a utility knife.
The roofing felt will lay horizontally along the plywood deck of the roof. Attach the roofing felt with roofing staples. Make sure you overlap each layer by at least 4 inches.

STEP 4: LAY AND SECURE THE FIRST METAL PANEL
When laying the metal, you will need to start from the bottom corner of the roof and work across. After you have finished each row of panels, you will then need to start a new row that overlaps the old row by at least 4 inches.
You can think of this process as moving across the bottom of the roof and then progressively getting higher and higher until you reach the peak.
When you start with the first metal panel, position it so that it overhangs the edge by at least 4 inches. Now slide a washer onto a 1 ½-inch wood screw and use your screwdriver to secure it to the plywood of the roof.
As a rule of thumb, you want it to be tight enough to hold it in place, but not so tight that you’ve dimpled the metal. Then, add screws approximately every 8 inches along the outside edge and bottom of the panel.

STEP 5: COMPLETE THE FIRST ROW
When it’s time to lay another metal panel, overlap the previous piece by at least one rounded corrugation. This will help to weatherproof the roof. Drive screws into the overlapped edge and bottom of each successive sheet.
For the last panel of every row, you may need to cut it to size, keeping in mind the need for overlap. You can use a saw or tin snips for this.

STEP 6: FINISH THE FIRST SIDE OF THE ROOF
Start the next row above the last panel on the previous row. Overlap the row below by 4 inches. Repeat the process to finish the first side of the roof.

STEP 7: LAY AND SECURE THE METAL PANELS ON THE OTHER SIDE
You will then need to repeat this process on the other side of the peaked roof.
STEP 8: ATTACH THE PEAKED RIDGE CAP
Finish the top by adding a peaked ridge cap that is shaped just like your roof. Lay this peak piece in place on the top of the roof, overlapping the row of metal below. Secure it with washers and screws as you did with the metal sheets.

STEP 9: SEAL THE ROOF SEAMS
Here you will take roofing cement or roofing caulk and make sure there are no exposed seams. You will then need to let the cement or caulk dry for at least 12 hours.

STEP 10: PAINT THE ROOF
To give your metal roof even more durability, you can paint it with a clear-coat polyurethane sealer. You can use a paintbrush for this, although some people prefer to use a paint sprayer for a large roof area.
CORRUGATED METAL ROOF INSTALLATION SAFETY
Always wear heavy gloves and safety googles when working on this roof installation project. Also, never stand directly on the roof, since this could dent the roof.
CONCLUSIONS
Corrugated metal roofing can be a convenient and relatively affordable way to provide protection without the need to install metal shingles. Moreover, a corrugated metal roof is highly durable and will last for decades. To learn more about the durability of your roof, see how long does a metal roof last.
When you decide to install corrugated metal roofing, you just need to make sure that you have the right materials. By taking steps to install the metal properly and making sure that there is plenty of overlap between each row, you will ensure a great lifespan for your new corrugated metal roof.

